
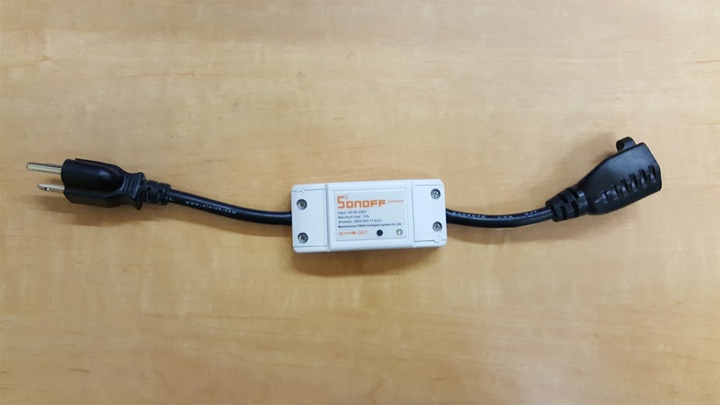
This is a wifi relay that can be found for as low as $5. I have had a few of these up and running for a little while now and they are working great. They can even support instant status updates (notify SmartThings on state change) when the switch is toggled by pressing the button, and are really quite simple to setup.

**Warning**: Do all of the flashing before connecting the switch to mains electricity. Be safe when working with electrical devices. I take no responsibility if you do something that damages yourself or your property. 😉
Flashing Firmware
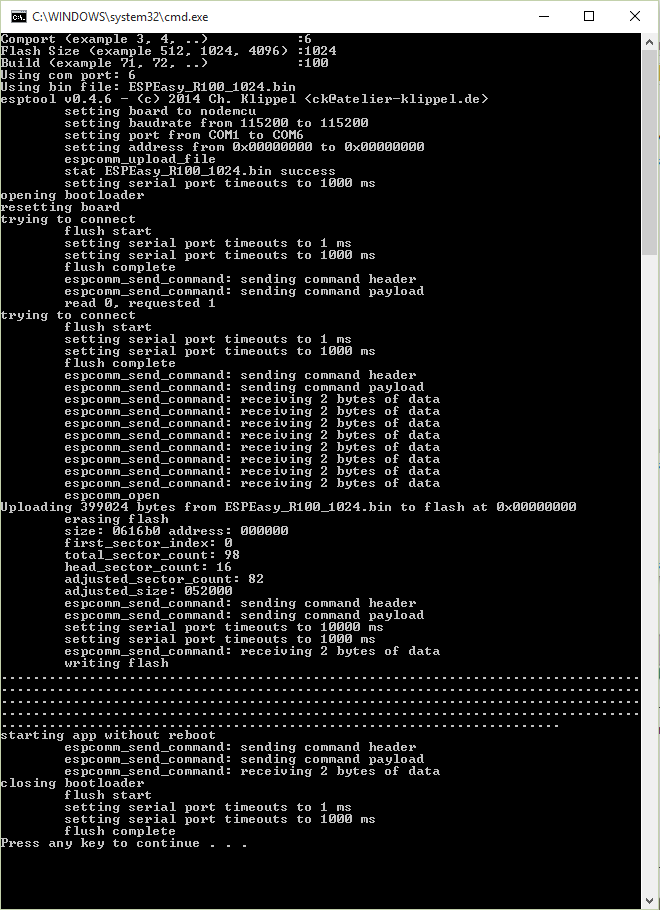
This step is extremely easy, so don’t let it intimidate you. I have built an image of ESPEasy that supports rules which are needed for some of the logic on the switch. First, download the ESPEasy firmware flashing tool. Next download the firmware image that I have built here, and place it in the same director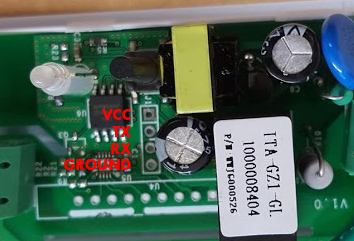 y that you extracted the ESPEasy flash.cmd tool in. Now, with an FTDI Adapter
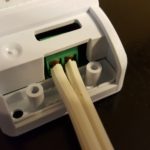
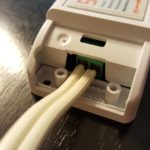
 (SET AT 3.3V) connected to the switch (square pin = VCC, then TX , RX, GROUND – that order), plug the FTDI adapter into the USB port of your computer while holding down the button on the switch. This puts it into programming mode. Run the flash.cmd script that came in the ESPEasy zip download and enter the following settings (COM Port: specific to your computer, Flash Size: 1024, Build: 100). Wait for it to finish and the hardest part is done.
Connect to Your Home Wifi
Now, plug the switch into power and wait for a moment. It should create an access point named ESP_00. Connect to that access point with the password: configesp and it should redirect you to the page where you can connect it to your access point. If it doesn’t redirect you the IP address is 192.168.4.1. Put in your network access point information and hit connect. Waiting at this page will usually give you the IP address of the switch before it kicks you off of it’s ESP_00 access point.
The switch should then connect to your Wifi access point. I recommend setting a DHCP reservation for the switch or giving it a static IP address at this point. If the splash page that shows you the switches IP address (mentioned above) did not appear, use whatever technique you usually use on your network to find a newly attached devices ip address. Your DHCP server / router is a good place to start.
SmartThings Setup
Add the device handler to your SmartThings account.
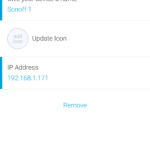
Create a new device in the IDE and choose the Sonoff Wifi Switch device handler. In the SmartThings App, find the switch and edit it’s preferences with the IP address. Hit “Done” and the device handler should configure the switch with the devices and rules that it needs to function. The status portion of the handler should notify you that the configuration was successful. If it doesn’t change after a few seconds try hitting the “configure” button.


Configure Switch for Instant Status Updates (optional)
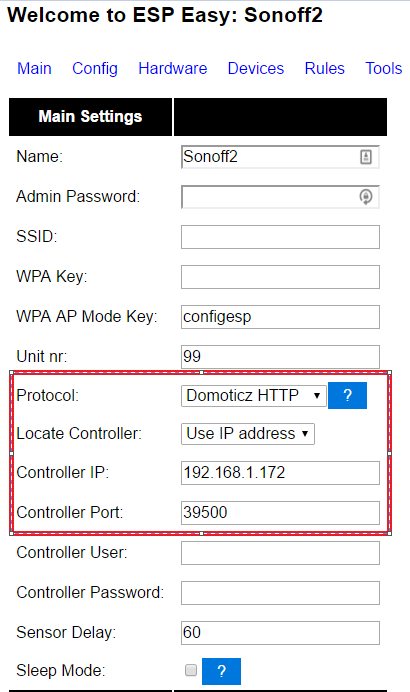
If you want SmartThings to get notified when you press the button on the switch, connect to the switch via http://ipaddress/config and put the IP address of your SmartThings hub and port 39500 in the config as seen below.
Where to Buy
It just so happens that Itead is having a promotional sale on their products. Click through to this link to get some great smart home gear at up to 20 – 30 % off!
Just what I was looking for! You instructions were spot on!
Great, glad they helped!
will this work with iOS?
With the firmware from this blog, the switch can be controlled with any web browser. So yes, it will work with iOS. In addition, SmartThings is cross platform and has an iOS app. If you integrate the switch into SmartThings, then it can be controlled within that app.
Hello… thanks for sharing this awesome DIY project. I successfully got as far as connecting to the wifi page, selecting my network and entering in my network password. It then counts down to 0 from 20, but doesn’t kick me off the connection or connect to my wifi. Any suggestions?
hey, again… I got it working! These things are finicky… had to unplug and plug it in maybe a half dozen times, but it eventually took. Thanks so much for this great setup… I’ve also found your page on smarthings website.
Glad you got it working!
Hi there, really appreciate your effort and the instructions were great. Owe it to you as these Sonoff switches are cheap and very flexible to add in any circuit.
Recently I had an issue where these are disconnected from my wifi and wont be controlled through Smartthings. Do you have any suggestions how I can get them back. Currently able to use the manual button only.
First thing to try is to unplug and plug it back in. If that doesn’t work, I have noticed an issue where if the Sonoff switch cannot connect to the saved AP after a certain amount of time, the wifi credentials get reset. This does not happen very frequently, but you should see it broadcasting its Sonoff.macAddress access point. Connecting it back to your network will get it working again.
The download link for ESPEasy firmware flashing tool is not accessible anymore. Could you please look into it.
Thanks for pointing that out. I have updated the link.
Hello
I do not have SmartThings, but am eagerly waiting for my Sonoff to arrive by mail, which will be my very first smart house device ever(super excited!!). Will I be able to use your guide up to just before the SmartThings setup part? I mean after the firmware update, will the Sonoff be manageable by connecting directly to it via a web browser?
Thanks a lot for the guide, I look forward to using it soon!
Oh oops I just noticed you replied to a similar question in the comments. So yes, I will be able to manage it via a web browser. Sweet thanks!
If you don’t plan on using it with another HA system, you might want to consider using the default firmware with the Ewelink app. I believe it works pretty well for standalone control of the Sonoff.
As I did understand… by default (no firmware update) it does NOT work with SmartThings ?
Yes, you are correct.
thanks… 🙁
Thank you so much for these informative articles! You are my new hero!
Question about the esptool. Seems easy enough. What is the harness to be used between this tool and the actual targeted device to be flashed?
Thanks.
Hmmm, the harness. So there is the FTDI adapter mentioned in the article. Then there are some jumper wires that are similar to these:
https://www.amazon.com/Haitronic-Multicolored-Breadboard-Arduino-raspberry/dp/B01LZF1ZSZ/ref=pd_lpo_147_tr_t_3?_encoding=UTF8&psc=1&refRID=Y0YB06BG1DJJXVEA7B9Z
Hi,
Got this up and running great with SmartThings and Alexa. One bug that’s annoying me though if you can help at all! I have set the advanced options to use GPIO14 as a toggle but it just never seems to work like that.
I have wires from the GND and GPIO14 pins to a normal wall switch (essential for the wife acceptance factor!). But it doesn’t seem any different from momentary… Am I missing something?
Great work though, you’ve inspired me to add to Smartthings much more cheaply!
Try the firmware I posted today as I have made some enhancements to the external switch code. Thoroughly tested in both momentary and toggle mode.
You sir are a star! It works perfectly now! The wife will be none the wiser 🙂 Any plans for the 4Ch SonOff device in the pipeline?
Yes, I do plan to add support but don’t have an ETA.
Sorry to comment again (I would do it myself if the source was available) but I was wondering if you might add an option to ‘lock out’ the GPIO14 input?
The use case I’m thinking off is where normally GPIO14 is connected to a physical switch (as I have for lights) but you want to disable this through ST when the house is in certain Modes to force the relay to remain in the position you dictate via ST.
// p.s. thanks for the 4ch, I was going to look at doing it myself this weekend till I noticed it appear! Does the 4ch maintain the use of 4 buttons to toggle the 4 relays?
I’m trying to think of the best way to implement it. I do think it is a great idea. If I create it as a setting like the other options of the device, it would take a few steps to disable the switch (going into the device preferences in SmartThings). To have it take place automatically with a mode change means I would have to create a custom command in SmartThings and you would have to use CoRE. I could create a child device that gets created if that option is enabled. The child device would be a switch that could be controlled from any SmartApp. Sorry, just thinking out loud here.
Me again (sorry).
I’m having some issues with 4 switches very close to each other. It seems that sometimes the spike of one switching affects others. Is there any debounce on the GPIO14? Could it be increased and maybe a delay added so it won’t respond to IO changes of something like less than 100ms or something?
There is a debounce set. I think it is 25ms if I remember correctly. I can probably add a settings option to change that to whatever you would like.
That would be awesome if it’s not too much trouble, and there is certainly no rush at all! I don’t think they like being bunched together behind a traditional switch in the wall.
FYI, I have added the debounce setting in the latest firmware.
the image link is not working
You are right, these instructions are a bit dated. I recommend going here for the latest files and info.
Hey
Thanks for the article. I was looking for something.
I am currently using the WiHouse solution.
Could I use one of these to control a garage door opener?
Yes, but you would need to get the Sonoff SV. There is an option I have programmed into the Sonoff called “Auto Off”. You would set this to 1 second because garage openers are expecting a “momentary” push. So when you turn the Sonoff SV on it stays on for 1 second and then turns on (simulating a short press of the button).
Hi thanks for doing that. Its work really easy for me. I want to tell if you guys dont see the ap after flash the sonoff press and hold the button for 28 second and after that you will see the sonoff ap. And please update the firmware link it don’t work.
Hey, flashing sonoff with the new bin file was really easy! I was originally looking for an easier way to make my sonoff work with home assistant. Any chance of making that happen with your firmware?
I actually think there might be a firmware out there that supports Home Assistant. Check with Google as the work may already be done.
Eric, I had to reset my Sonoff R2 to change the Wifi and now for advanced settings it’s asking me for a password. I don’t remember the original password i set up, is there a way to hard-reset this switch to remove all config & settings?
I think this applies:
Hold down button for 10-20 seconds to reset wifi and network settings
Hold down button for 20-60 seconds to reset all settings